Once the user who has exceeded their quota is allocated further disk space, you need to do so by taking the unutilized disk space from other users on the PC and then allocating this disk to the user who has exhausted their limit. anyway, without wasting any time let’s see How to Enable or Disable Disk Quotas in Windows 10 with the help of the below-listed tutorial. Note: The below tutorial will only enable or disable disk quotas, to enforce a disk quota limit you need to follow this tutorial instead.
Enable or Disable Disk Quotas in Windows 10
Make sure to create a restore point just in case something goes wrong.
Method 1: Enable or Disable Disk Quotas in Drive Properties
1.Press Windows Key + E to open File Explorer then from the left-hand menu click on This PC. 2.Now right-click on the NTFS drive [Example Local Disk (D:)] you want to enable or disable the disk quotas for and then select Properties.
3.Switch to the Quota tab then click on “Show Quota Settings“.
4.To Enable Disk Quota, checkmark “Enable disk quota management” then click OK.
5.You should see a pop-up message, just click OK to confirm.
6.Now if you need to disable Disk Quota then simply uncheck “Enable disk quota management” then click OK.
7.Again click on OK to confirm your actions. 8.Close everything then reboot your PC to save changes.
Method 2: Enable or Disable Disk Quotas in Registry Editor
1.Press Windows Key + R then type regedit and hit Enter to open Registry Editor.
2.Navigate to the following registry key: HKEY_LOCAL_MACHINE\SOFTWARE\Policies\Microsoft\Windows NT\DiskQuota Note: If you can’t find DiskQuota then right-click on Windows NT then select New > Key and then name this key as DiskQuota.
3.Right-click on DiskQuota then select New > DWORD (32-bit) Value.
4.Name this DWORD as Enable and hit Enter.
5.Now double-click on Enable DWORD to change it’s value to: 0 = Disable Disk Quota 1 = Enable Disk Quota
6.Click OK and close registry editor.
Method 3: Enable or Disable Disk Quotas in Windows 10 Using Group Policy Editor
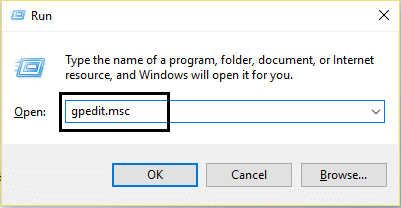
Note: This method won’t work for Windows 10 Home Edition, this method is only for Windows 10 Pro, Education, and Enterprise Edition. 1.Press Windows Key + R then type gpedit.msc and hit Enter.
2.Navigate to the following path: Computer Configuration\Administrative Templates\System\Disk Quotas 3.Make sure to select Disk Quotas then in right window pane double-click on Enable disk quotas policy.
4.Now in the “Enable disk quotas” policy properties use the following settings:
5.Click Apply followed by OK. 6.Close Group Policy editor then restart your PC.
Method 4: Enable or Disable Disk Quotas in Windows 10 Using Command Prompt
1.Press Windows Key + X then select Command Prompt (Admin).
2.Type the following command into cmd and hit Enter: fsutil quota track X:
Note: Replace X: with the actual drive letter for which you want to enable disk quotas (ex fsutil quota track D:) 3.Now to disable disk quotas simply use the following command and hit Enter: fsutil quota disable X:
Note: Replace X: with the actual drive letter for which you want to disable disk quotas (ex fsutil quota disable D:) 4.Close the command prompt and reboot your PC. Recommended:
3 Ways to Check if a Disk Uses MBR or GPT Partition in Windows 10 How to Use Disk Cleanup in Windows 10 Enable or Disable Case Sensitive Attribute for Folders in Windows 10 How to Install or Uninstall Graphics Tools in Windows 10
That’s it you have successfully learned How to Enable or Disable Disk Quotas in Windows 10 but if you still have any queries regarding this tutorial then feel free to ask them in the comment’s section.